General usage of PSD templates

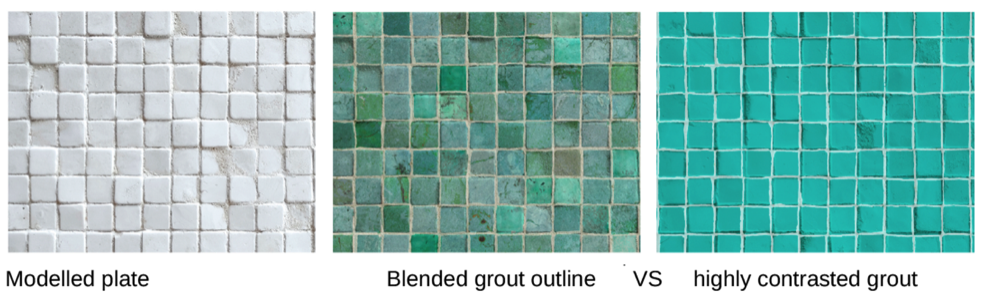
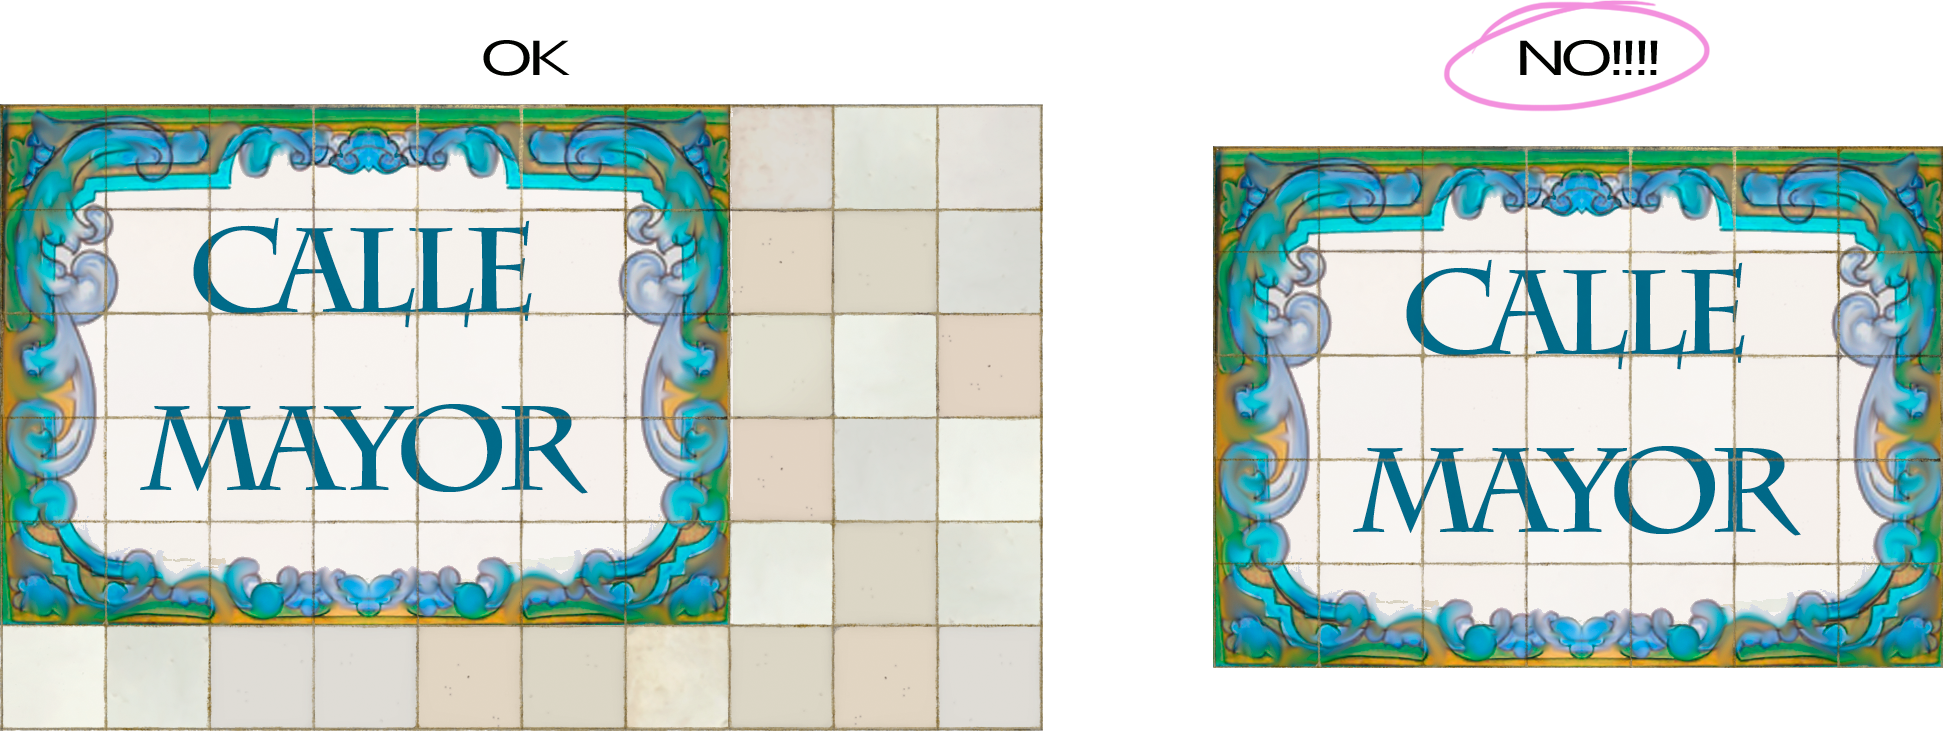
While editing your template please keep in mind that, as a semi-handmade product, RolledWall speciality is the recreation of textured surfaces.

Any small crack or mark on the material, as well as any slight displacement of the printed image will be more evident in a polished, new surface than in an aged one.

You can see an example in image 1.

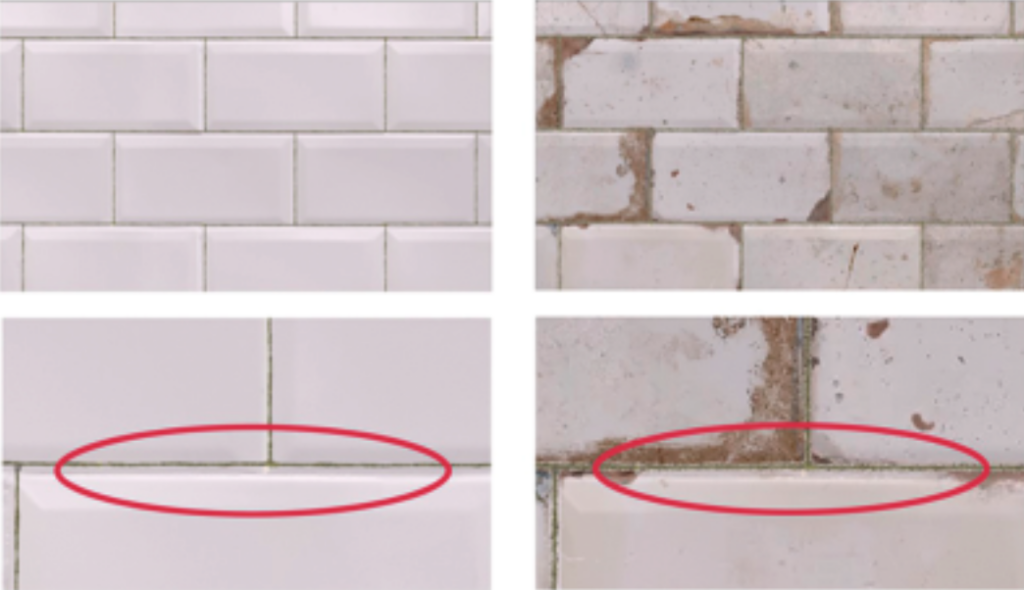
1. Old textures perform better than tidy ones.

1. How to place easily your design in the tiles template

  • Once your tile design is included in the grid you can start modifying layers opacity, color balance, luminance, etc. Please note that every layer has a “Lock position” activated (Image 2). 
  • DO NOT unlock any layer for any reason, otherwise it may be displaced and won’t adjust accurately to the modelled plate. You can duplicate or delete existing layers but DO NOT change the layers order as it will degrade the texture result.
  • DO NOT trim or resize any layer, final image or resolution  and DO NOT color or trim margins, as shown in image 3.
  • Finally, DO NOT reduce the opacity in the THIN GROUT, THICK GROUT, CRACKS and AGED EFFECT layers . We’ve tested that 100% opacity provides the best result for this texture.

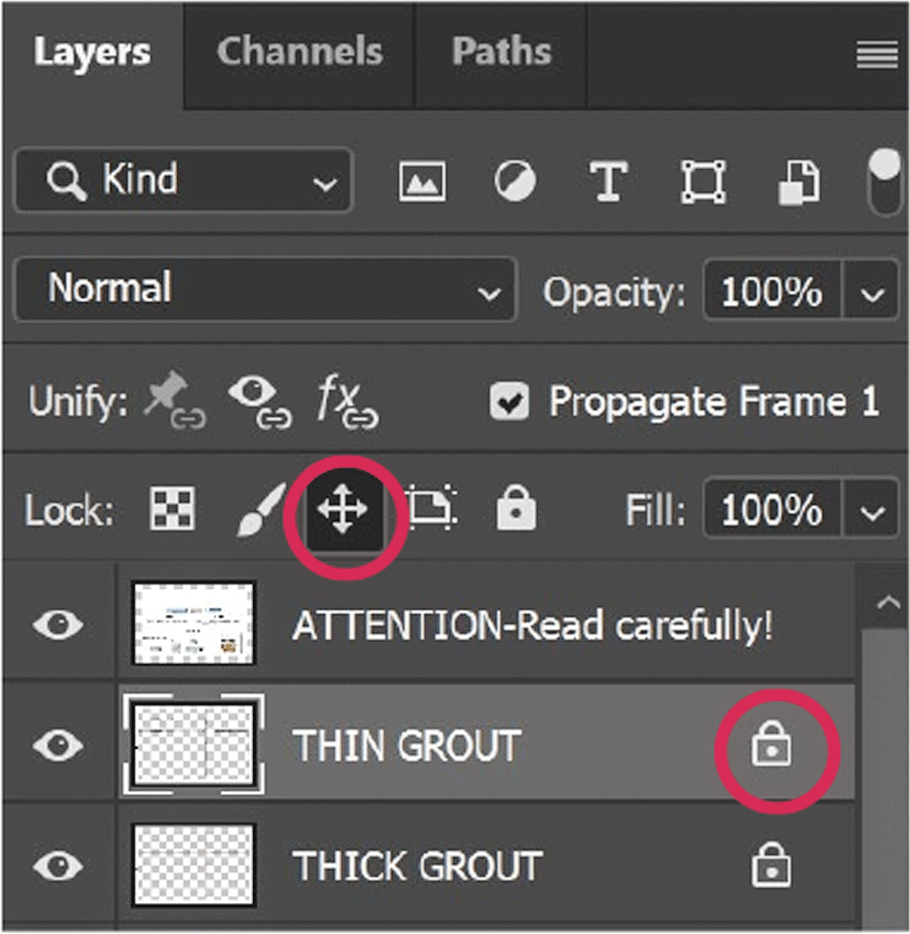
2. Do not unlock layers

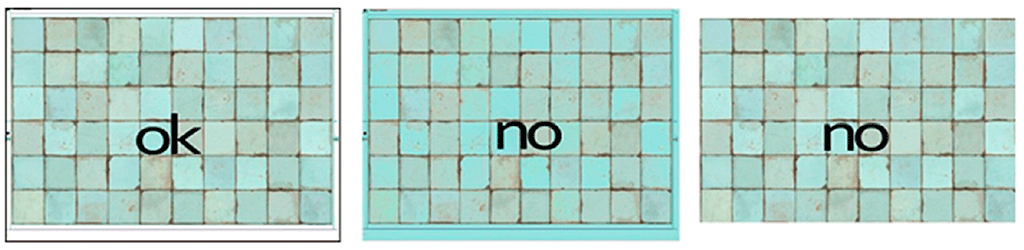
3. Do not color or erase margin

2. How to place easily your design in the 5.90 X 5.90 in tiles template

  • Open the Layers tab. Go to “Window” and then “Layers” (or press F7). Once the layers tab is open, double click on the icon in the layer “INSERT YOUR DESIGN” as shown in image 4
  • A new tab will open with the existing design of the 5.90 x 5.90 in tile. Place your design on top of the existing one and align it until it fits perfectly to the canvas. 
  • Click “Save” and close the tab. Your will see now your own design covering the whole template.  Merge now the “INSERT YOUR DESIGN” layer with the 
  • “YOUR TILES” layer. Before proceeding to the next step, click on the icon “Lock position” on the “YOUR TILES” layer, as shown in image 5.

.

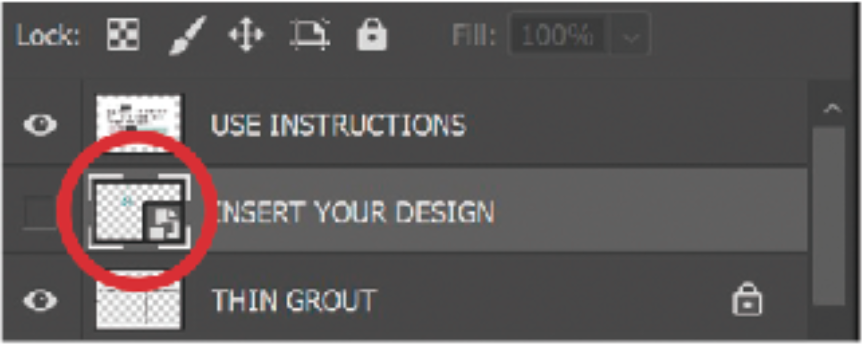
4. Double click the layer icon.       

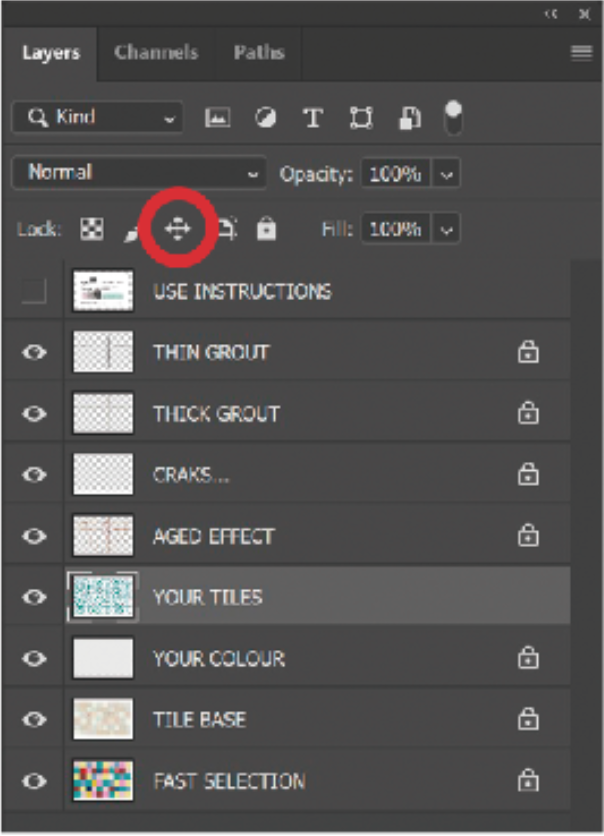
5. Lock position in the “YOUR TILE” layer

3. Working tiles separately

  • In case that you need to work your tiles separately you can use the FAST SELECTION layer.
  • This is useful in geometric designs composed by groups of 4 tiles. You can select, duplicate and rotate Your tile manually.
  • Ensure that all tiles are placed correctly without gaps between them, as shown in image 6 & 7.

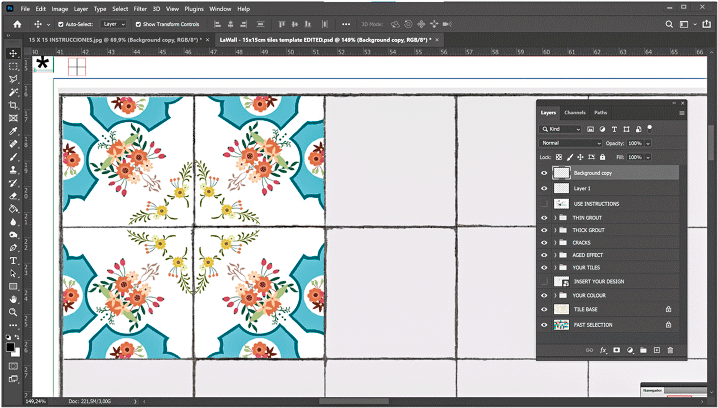
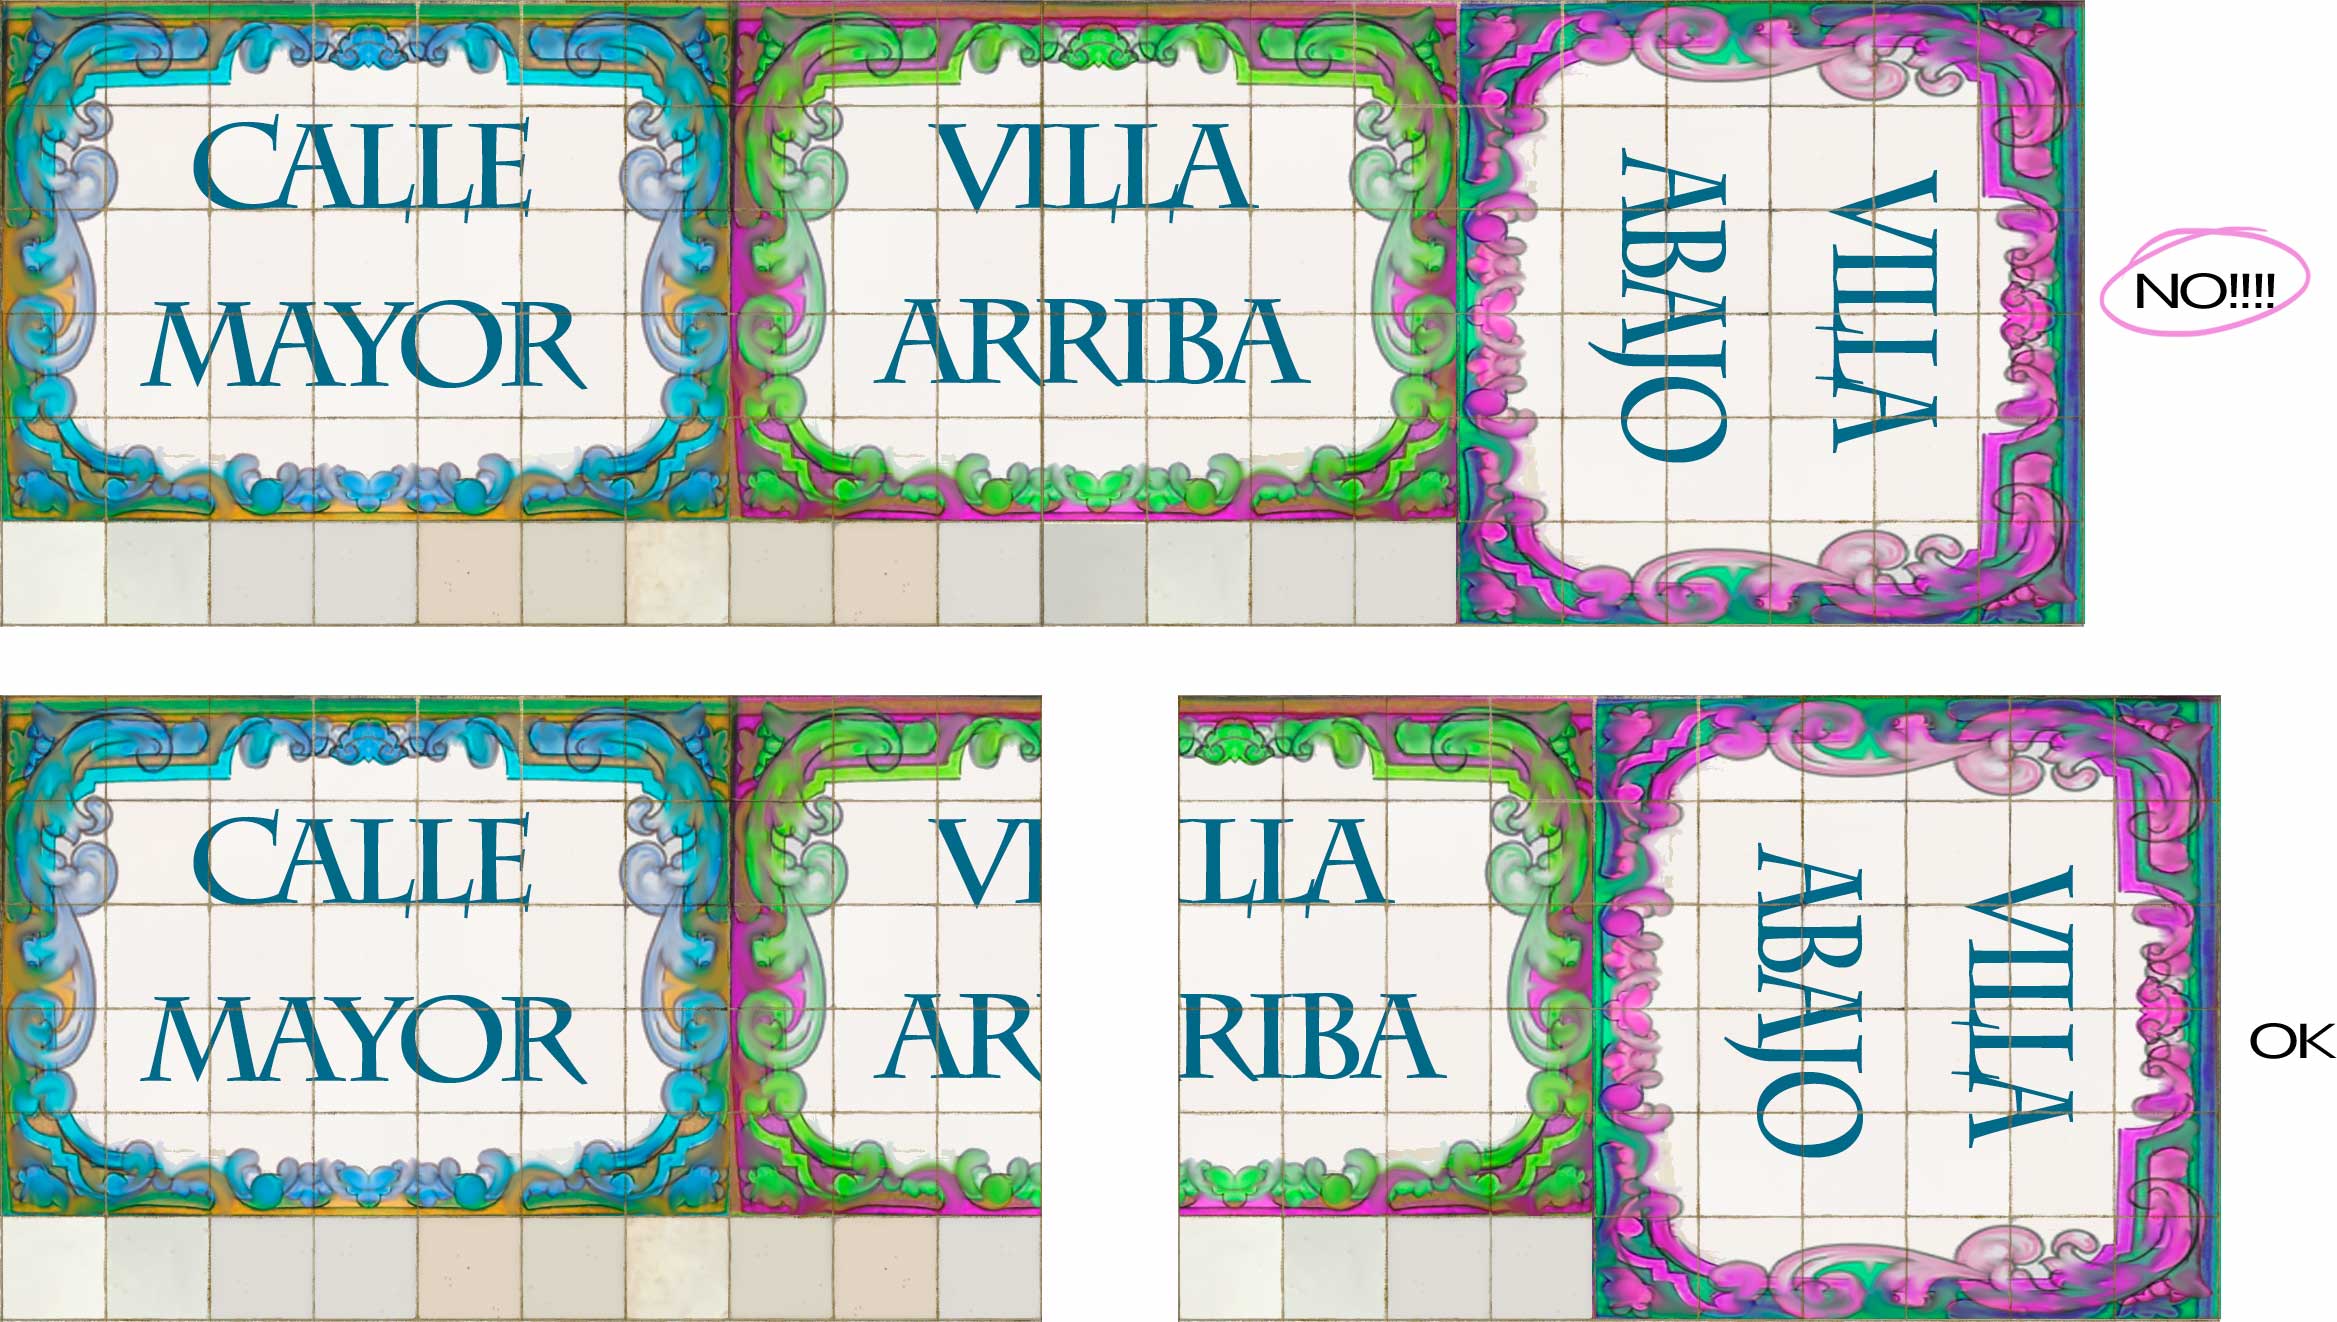
6. Properly placed tiles

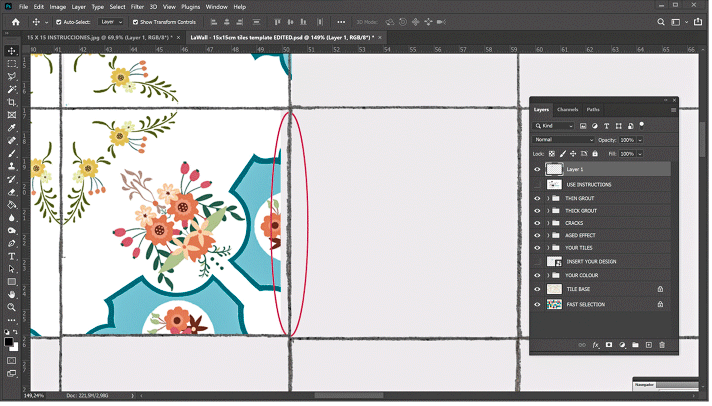
7. Wrong positioned tile with gap on the right.

4. How to edit the  Gresite template

  • In order to start editing your design, first open the Layers tab. Go to “Window” and then “Layers” (or press F7 key)
  • You can start modifying the GRESITE layer color balance, luminance, levels, etc. While working the GROUT layer, please keep in mind that the GROUT outline must not be highly contrasted to the GRESITE layer, so that you can achieve the best possible result, as shown in the images below.

5. How to save and send your template

  • Once your design is finished, check carefully for posible errors (displaced or blurry images or colors for instance).
  • Save it As .JPG format. DO NOT change the original image size, quality or resolution (175DPI) during the design or saving process.
  • Choose a simple and descriptive file name and send it to us.
  • Before closing your template, be sure to keep a safety .PSD file with all the layers unmerged. It could be necessary for any future adjustment. Keep this backup file in your folder.
  • Please do not send this .PSD file to us. We will request that you send it to us just in case that it is needed for any further correction.

Always follow these directions:

1. Do not cut the templates

Always send us the complete sheet, regardless of what it contains. 

2. Do not send them to us together

  • Make the most of the entire surface of the plates!!!!
  • In the montage, you will see that 3 drawings fit in 2 sheets. 
  • In the image below (OK) you will see how you have to send them to us.

Important information

  • When you talk to us, remember that the sheet on the left IS NOT 4 sheets. It is a single sheet.
    For us, both the one on the right and the one on the left are a unit, since the drawings it contains are not relevant to count them.

Want to make an assembly with different models of sheets?

If you want to make a montage with different models of tiles you can do it. In fig. on the left, you will see that arrow “a” indicates a placement with the 5.90 in x 5.90 in tiles displaced from each other, and arrow “b” shows you that part of the assembly is done with tiles of another model (3.93 in x 3.93 in)

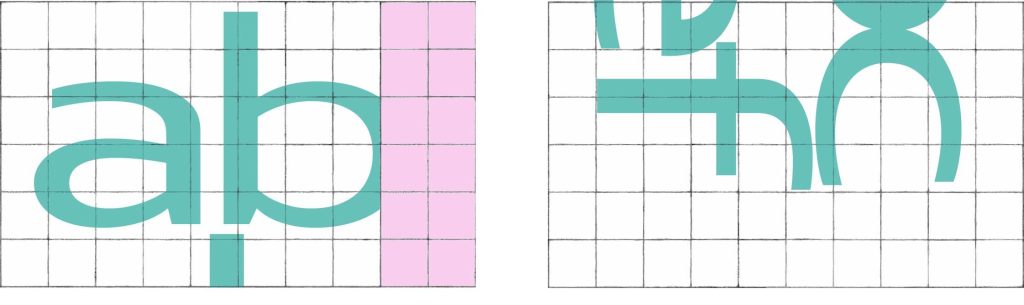
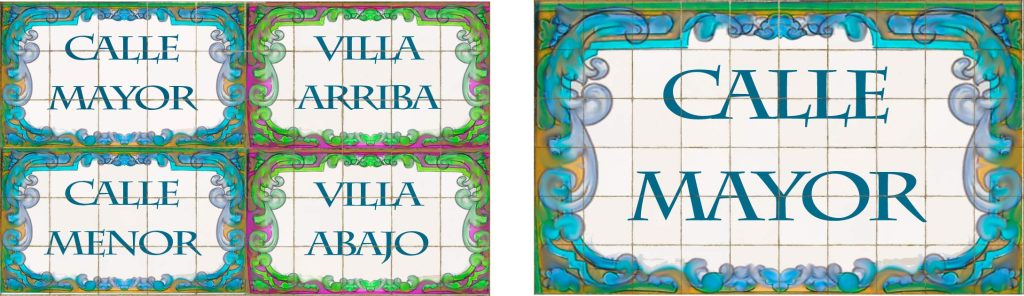
As our sheets are always whole and only have one tile format in each of them, you will have to make a “puzzle” so that when the sheets arrive you can cut them out and assemble them as you wish.

In this case, with 3 sheets you will have enough. In pink we indicate the material that you will have left over, the combination that we show you is just one way of doing it.